

The Bublcam can capture a time-lapse by taking multiple photos over a pre-determined period of time. The photos will appear as separate files on your media view  . If you would like to use them to create a time-lapse video, you will have to import these raw files into editing software to create the video. See How To Create Time-Lapse Videos Using Adobe Premiere for instructions on the editing process once you've captured your time-lapse files.
To trigger a time-lapse capture:
- Connect your device to the Bublcam and open the mobile app.
- From the app home screen, select Capture
 .
. - Select the more button to access the side panel.
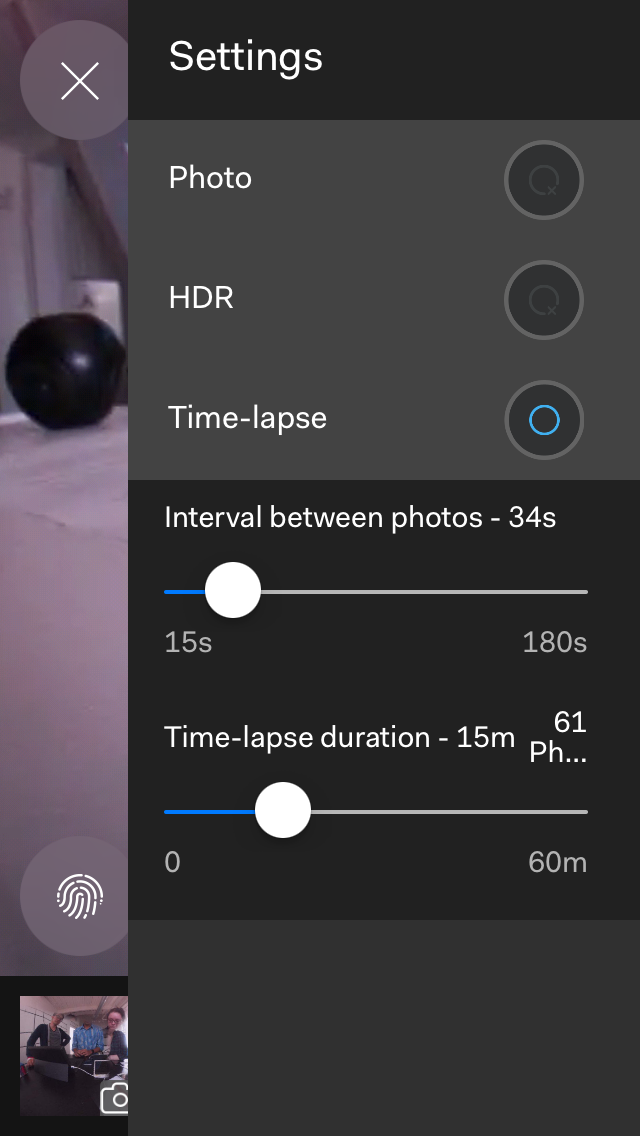
- Select “Time-lapse”.
- There are two sliders. One controls the interval between time-lapse photos (15 seconds - 180 seconds). The other controls the duration of the entire time-lapse (1 minute - 60 minutes). The number of photos is calculated with these numbers. Unlimited duration: if you set the time-lapse duration to 0, the Bublcam will continue to capture time-lapse photos until you select the capture button to stop it...or until the Bublcam powers off.
- Close the side panel.
- Tap the capture button to begin capturing your time-lapse. The Bublcam will proceed to capture photos based on the intervals and duration that you’ve set.
NOTE: Time-lapse is cancellable, if the Bublcam is in between captures (during waiting state) and you select the capture button, the time-lapse will stop or shutdown respectively.
The file name format is “txxxyyyy” where xxx indicates the time-lapse index and yyyy is the image number within the current time lapse index. eg. t0010274, t0010275.
IMPORTANT: To complete the creation process of a time-lapse video, you must see How To Create Time-Lapse Videos Using Adobe Premiere for instructions on the editing the files once you've captured your time-lapse.
Comments